为Hbuilder iOS webapp集成极光推送

DCloud的webapp解决方案功能强大,但是官方所集成的是个推并且版本非常老,许多功能(比如说别名推送等等)不能使用,因此为它集成JPush(极光推送)。

集成具体方法如下:

1、下载极光sdk

在极光官方网站下载极光推送ios sdk 网址:http://docs.jiguang.cn/resources/

将其库文件(如下图所示)提取出来,
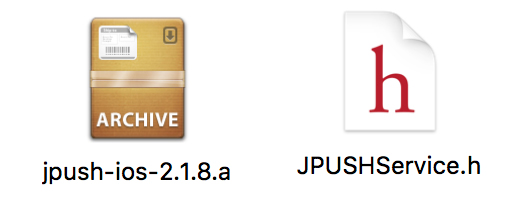
upload successful

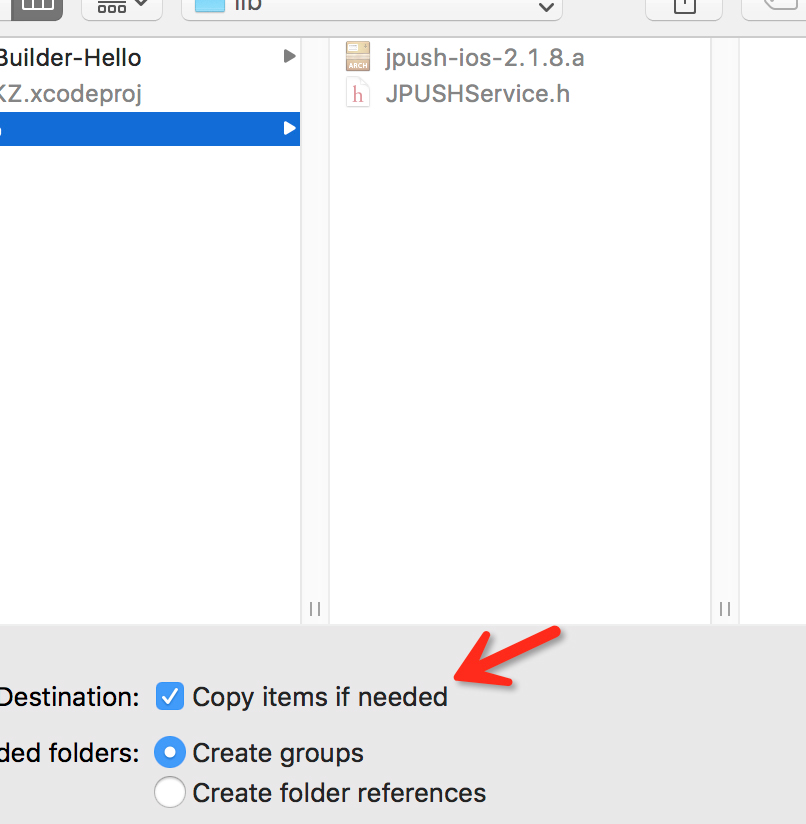
将其导入Hbuilder XCode工程的Frameworks中(如下图所示)

(1)导入步骤1
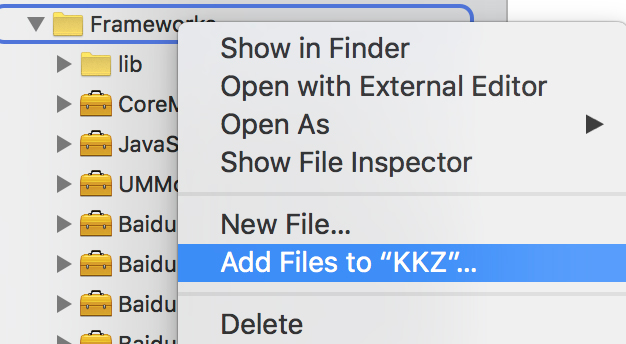
upload successful

(2)导入步骤2

upload successful

2、添加文件

在inc/tools(或其它文件夹)下建立文件PGJiguanPush.h与PGJiguanPush.m,内容如下:

1
2
3
4
5
6
7
8
9
10
11
12
13
14
15
16
17
18
19
20
21
22
23
24
25
26
27
28
29
30
31
32
33
34
35
36
37
38
39
40
41
42
43
44
45
46
47
48
49
50
51
52
53
54
55
56
57
58
59
60
61
62
63
64
65
66
67
68
69
70
71
72
73
74
75
//=========PGJiguanPush.h========
#import "PGPlugin.h"
#import "PGMethod.h"

@interface PGJiguanPush : PGPlugin
// +(id)alloc
// +(PGJiguanPush *)sharePGJGManager
- (void)PluginSetTagsFunction:(PGMethod*)commands;
- (void)PluginGetRegistrationIDFunction:(PGMethod*)commands;
- (void)changeStatus;
@end
//=========PGJiguanPush.m========
#import "JPUSHService.h"
#import "PGJiguanPush.h"

@interface PGJiguanPush()
{
Boolean registeredStatus ;
}
@end
@implementation PGJiguanPush
//获取自定义消息
//static PGJiguanPush * manager = Nil;
// +(PGJiguanPush *)sharePGJGManager
// {
// @synchronized(self)
// {
// if (!manager) {
// manager = [[PGJiguanPush alloc]init];
// }
// return manager;
// }
// }
// +(id)alloc
// {
// @synchronized(self)
// {
// if (!manager) {
// manager =[super alloc];
// }
// return manager;
// }
// }
// -(id)init
// {
// if (self = [super init])
// {
// NSNotificationCenter *defaultCenter = [NSNotificationCenter defaultCenter];
// [defaultCenter addObserver:self
// selector:@selector(networkDidSetup:)
// name:kJPFNetworkDidSetupNotification
// object:nil];
// [defaultCenter addObserver:self
// selector:@selector(networkDidClose:)
// name:kJPFNetworkDidCloseNotification
// object:nil];
// [defaultCenter addObserver:self
// selector:@selector(networkDidRegister:)
// name:kJPFNetworkDidRegisterNotification
// object:nil];
// [defaultCenter addObserver:self
// selector:@selector(networkDidLogin:)
// name:kJPFNetworkDidLoginNotification
// object:nil];
// [defaultCenter addObserver:self
// selector:@selector(networkDidReceiveMessage:)
// name:kJPFNetworkDidReceiveMessageNotification
// object:nil];
// [defaultCenter addObserver:self
// selector:@selector(serviceError:)
// name:kJPFServiceErrorNotification
// object:nil];
// }
// return self;
// }

#pragma mark 插件方法

1
2
3
4
5
6
7
8
9
10
11
12
13
14
15
16
17
18
19
20
21
22
23
24
25
26
27
28
29
30
31
32
33
34
35
36
37
38
39
40
41
42
43
44
45
46
47
48
49
50
51
52
53
54
55
56
57
58
59
60
61
62
63
//设置tags 、alias
- (void)PluginSetTagsFunction:(PGMethod*)commands
{
if ( commands ) {
NSString* cbId = [commands.arguments objectAtIndex:0];
NSString* pArgument1 = [commands.arguments objectAtIndex:1]; // tags
NSString* pArgument2 = [commands.arguments objectAtIndex:2]; // alias
NSSet * tags = [NSSet setWithObject:pArgument1];
[JPUSHService setTags:tags alias:pArgument2 fetchCompletionHandle:^(int iResCode, NSSet *iTags, NSString *iAlias){
NSArray* pResultString = [NSArray arrayWithObjects:[NSString stringWithFormat:@"%d",iResCode], iTags, iAlias, nil];
PDRPluginResult * result = [PDRPluginResult resultWithStatus:PDRCommandStatusOK messageAsArray: pResultString];
[self toCallback:cbId withReslut:[result toJSONString]];
}];
}
}

//获取 RegistrationID
- (void)PluginGetRegistrationIDFunction:(PGMethod*)commands
{
NSNotificationCenter *defaultCenter = [NSNotificationCenter defaultCenter];
[defaultCenter addObserver:self
selector:@selector(changeStatus)
name:kJPFNetworkDidLoginNotification
object:nil];
if ( commands && registeredStatus) {
NSString* cbId = [commands.arguments objectAtIndex:0];
[self toCallback:cbId withReslut:[JPUSHService registrationID]];
}
}
-(void)changeStatus
{
registeredStatus = 1;
}

//- (void)networkDidSetup:(NSNotification *)notification {}
//- (void)networkDidClose:(NSNotification *)notification {}
// - (void)networkDidRegister:(NSNotification *)notification {}
// - (void)networkDidLogin:(NSNotification *)notification {}
//- (void)networkDidReceiveMessage:(NSNotification *)notification {}
// - (void)serviceError:(NSNotification *)notification {}
// - (void)unObserveAllNotifications {
// NSNotificationCenter *defaultCenter = [NSNotificationCenter defaultCenter];
// [defaultCenter removeObserver:self
// name:kJPFNetworkDidSetupNotification
// object:nil];
// [defaultCenter removeObserver:self
// name:kJPFNetworkDidCloseNotification
// object:nil];
// [defaultCenter removeObserver:self
// name:kJPFNetworkDidRegisterNotification
// object:nil];
// [defaultCenter removeObserver:self
// name:kJPFNetworkDidLoginNotification
// object:nil];
// [defaultCenter removeObserver:self
// name:kJPFNetworkDidReceiveMessageNotification
// object:nil];
// [defaultCenter removeObserver:self
// name:kJPFServiceErrorNotification
// object:nil];
// }
//- (void)serviceError:(NSNotification *)notification {}
@end

(根据业务需求,没有具体写自定义消息的方法,只使用了标准消息,如果有需要可以自己弄)

3、增加全局描述

在Supporting Files目录下找到pch文件,在文件最后加上

static NSString *appKey = @"你的appkey";// appkey,极光创建app时能拿到

static NSString *channel = @"0";// App Store等渠道,乱填也行~

static BOOL isProduction = 0; //值要与Build Settings的Code Signing配置的证书环境一致 0开发 1生产

4、添加注册、接收等方法

参考极光官方文档,网址:http://docs.jiguang.cn/guideline/ios_guide/

修改inc/AppDelegate.m如下:

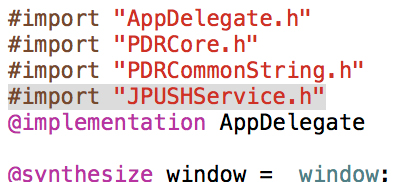
(1)在头部添加引用

1
#import "JPUSHService.h"

如下图所示

upload successful

(2)在官方注释"程序启动时收到push消息"的代码做如下修改:

1
2
3
4
5
6
7
- (BOOL)application:(UIApplication *)application didFinishLaunchingWithOptions:(NSDictionary *)launchOptions
{
// 设置当前SDK运行模式
BOOL ret = [PDRCore initEngineWihtOptions:launchOptions
withRunMode:PDRCoreRunModeNormal];
return ret;
}

改成

1
2
3
4
5
6
7
8
9
10
11
12
13
14
15
- (BOOL)application:(UIApplication *)application didFinishLaunchingWithOptions:(NSDictionary *)launchOptions
{
// 设置当前SDK运行模式
BOOL ret = [PDRCore initEngineWihtOptions:launchOptions
withRunMode:PDRCoreRunModeNormal];
[JPUSHService registerForRemoteNotificationTypes:(UIUserNotificationTypeBadge |
UIUserNotificationTypeSound |
UIUserNotificationTypeAlert)
categories:nil];
[JPUSHService setupWithOption:launchOptions appKey:appKey
channel:channel
apsForProduction:isProduction
advertisingIdentifier:nil];
return ret;
}

(3)官方注释“远程push注册成功收到DeviceToken回调”的代码做如下修改:

1
2
3
4
- (void)application:(UIApplication *)application didRegisterForRemoteNotificationsWithDeviceToken:(NSData *)deviceToken
{
[PDRCore handleSysEvent:PDRCoreSysEventRevDeviceToken withObject:deviceToken];
}

改成

1
2
3
4
5
- (void)application:(UIApplication *)application didRegisterForRemoteNotificationsWithDeviceToken:(NSData *)deviceToken
{
[PDRCore handleSysEvent:PDRCoreSysEventRevDeviceToken withObject:deviceToken];
[JPUSHService registerDeviceToken:deviceToken];
}

(4)官方注释“远程push注册失败”的代码做如下修改:

1
2
3
4
5
6
7
- (void)application:(UIApplication *)application didFailToRegisterForRemoteNotificationsWithError:(NSError *)error
{
[PDRCore handleSysEvent:PDRCoreSysEventRegRemoteNotificationsError withObject:error];
}
- (void)application:(UIApplication *)application didReceiveRemoteNotification:(NSDictionary *)userInfo {
[PDRCore handleSysEvent:PDRCoreSysEventRevRemoteNotification withObject:userInfo];
}
改成
1
2
3
4
5
6
7
8
9
10
- (void)application:(UIApplication *)application didFailToRegisterForRemoteNotificationsWithError:(NSError *)error
{
[PDRCore handleSysEvent:PDRCoreSysEventRegRemoteNotificationsError withObject:error];
NSLog(@"did Fail To Register For Remote Notifications With Error: %@", error);
}
- (void)application:(UIApplication *)application didReceiveRemoteNotification:(NSDictionary *)userInfo {
[PDRCore handleSysEvent:PDRCoreSysEventRevRemoteNotification withObject:userInfo];
[JPUSHService handleRemoteNotification:userInfo];
NSLog(@"JPush成功接收消息,可以在webview中获取了");
}

5、在webview中获取推送事件

完成以上修改后,使用XCode运行APP可以在LOG中看到类似

2016-08-02 19:03:07.690 | JPUSH | I - [JPUSHDeviceTokenReport] upload device token success

的消息则说明极光推送已经集成成功,如果在极光推送后台统计页面可以看到此时的应用安装数量增加了1

由于是直接在AppDelegate.m的didReceiveRemoteNotification中写的[JPUSHService handleRemoteNotification:userInfo],因此消息直接传给了基座,可以直接在webview网页中用plus.push获取消息。

例如,我直接在index.html中写了

1
2
3
4
5
6
7
8
mui.plusReady(function() {
plus.push.addEventListener( "click", function ( msg ) {
alert( "用户点击了消息: " + JSON.stringify(msg) );
}, false );
plus.push.addEventListener( "receive", function ( msg ) {
alert( "app收到了消息: " + JSON.stringify(msg) );
}, false );
});

6、测试

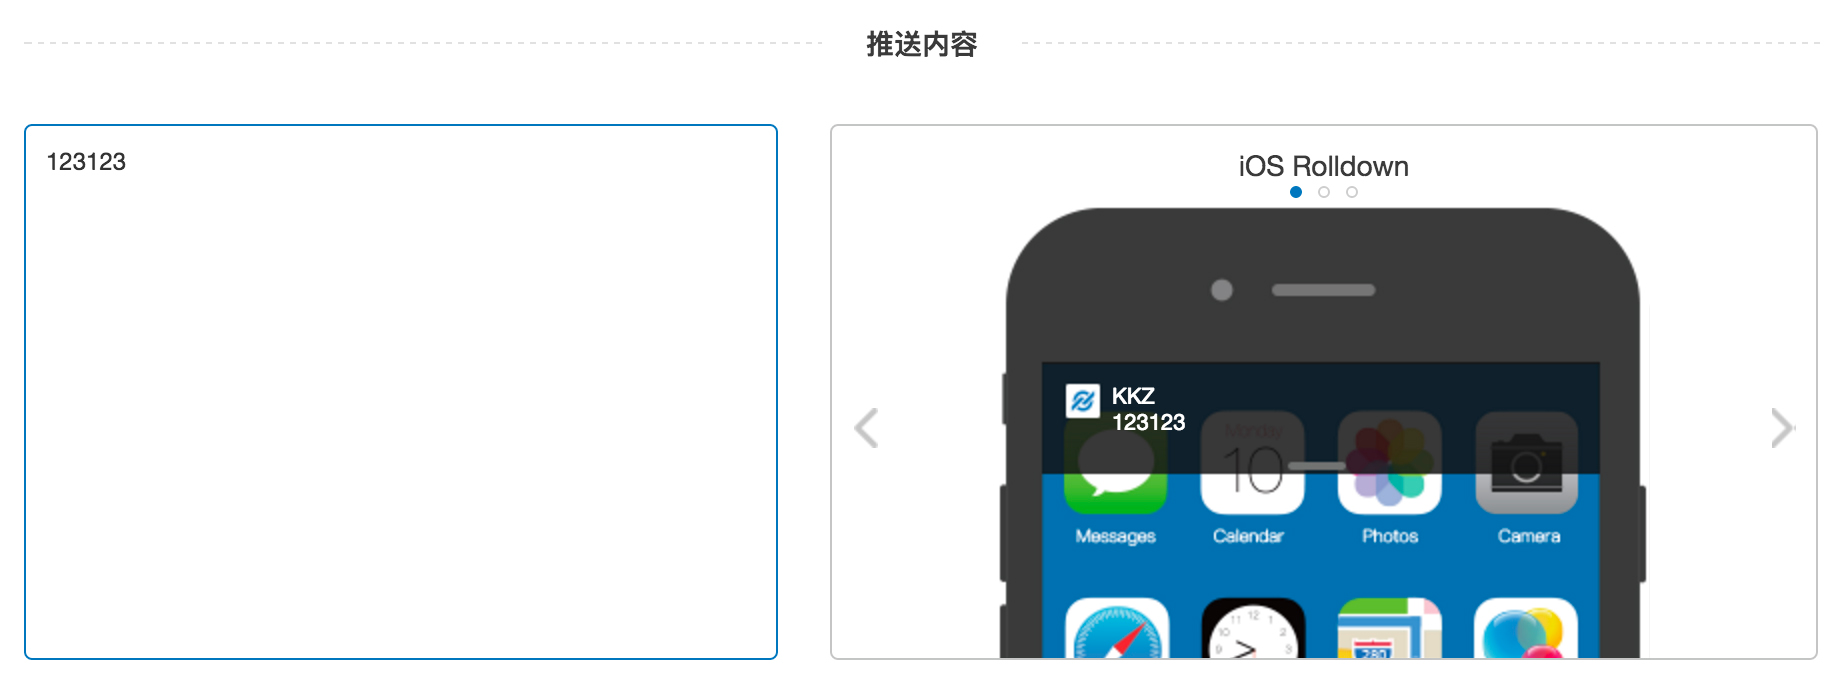
在极光开发者后台增加一条推送消息试试

upload successful

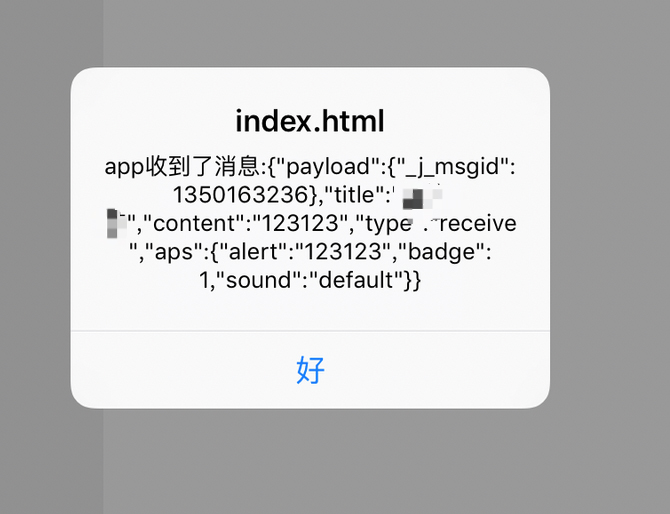
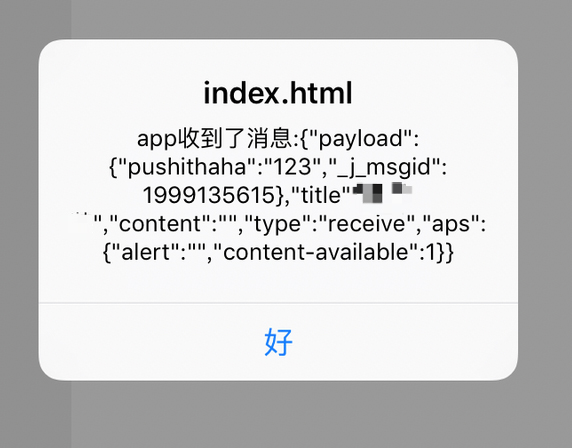
在app中弹出了对应消息

upload successful

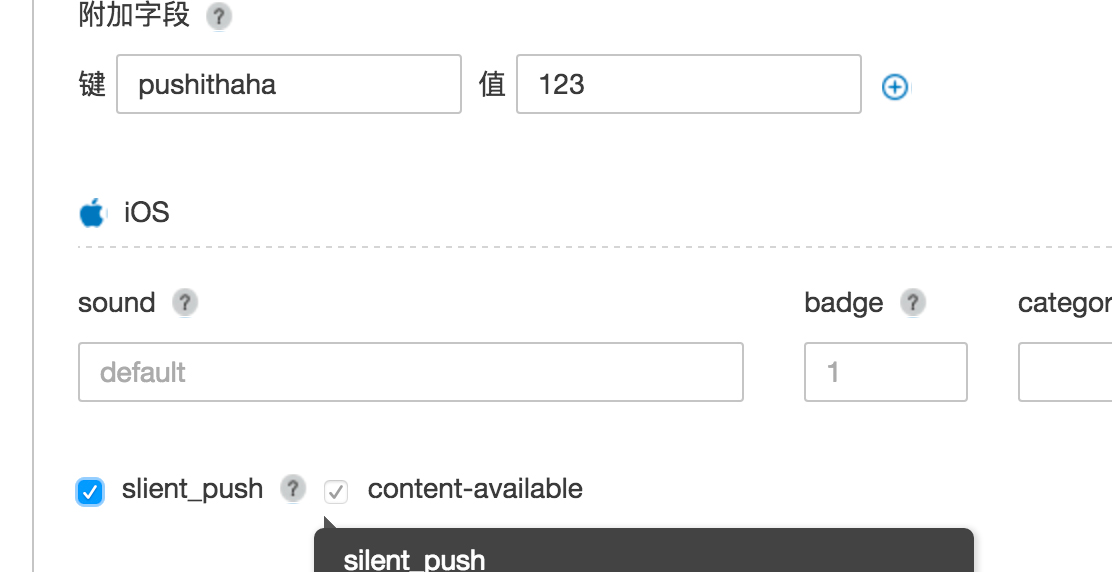
静默发送参数试试

upload successful

成功地获取了传送的参数

upload successful